How to Update ETHOS System Version
1. Using the X20 transmitter as an example
First, ensure the transmitter is powered off. While holding down the ”Enter“ key, press the “Power“ button to enter the bootloader screen. Check if there is a version number displayed in the upper-right corner of the screen, as shown in the picture.
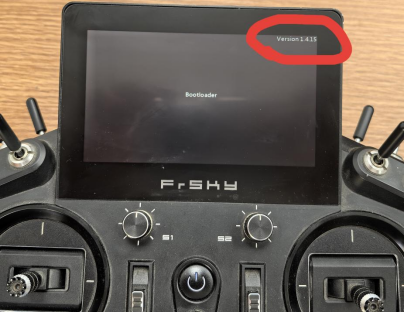
Note: If the version is not displayed, please refer to the tutorial【How to Use the ETHOS SUITE Software】to make the version visible before proceeding with the next steps.
If the version is displayed, proceed directly to Step 2.
2. Go to ethos.frsky-rc.com, download the latest ETHOS Suite installation package from the homepage, then extract and install it.

Note 1: For Windows 10 systems, choose the Windows version (using a version lower than Windows 10 is not recommended as it may cause crashes). For Mac computers, choose the macOS version.
Note 2: The Ethos Suite software version on the website is updated periodically, so please check for updates regularly.
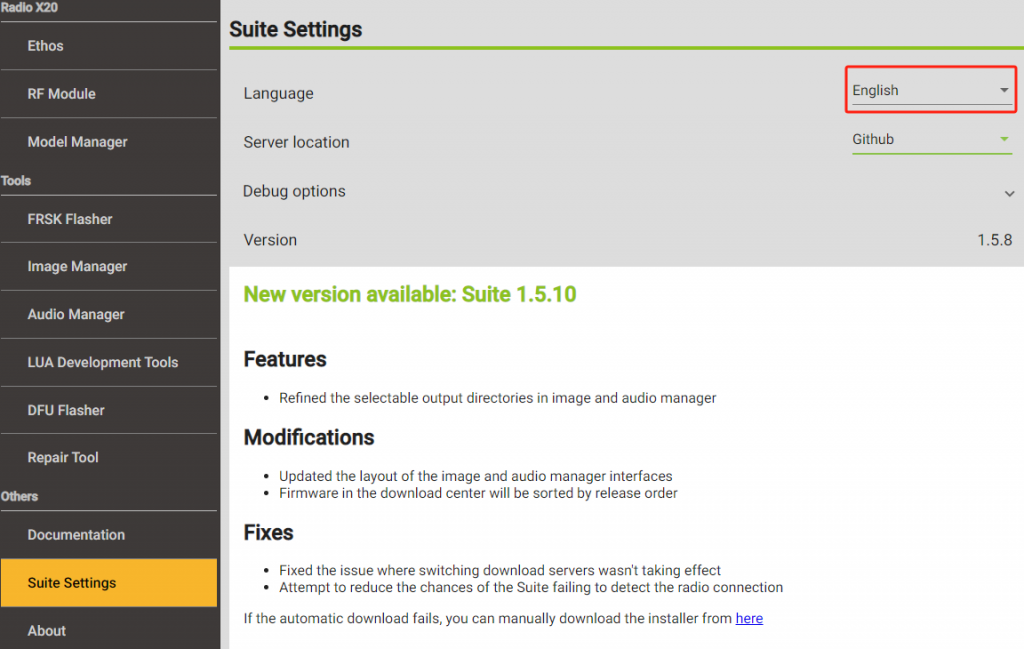
3. Open the Ethos Suite software, find 【Suite settings】 in the left sidebar, change the language you need, as shown in the picture.

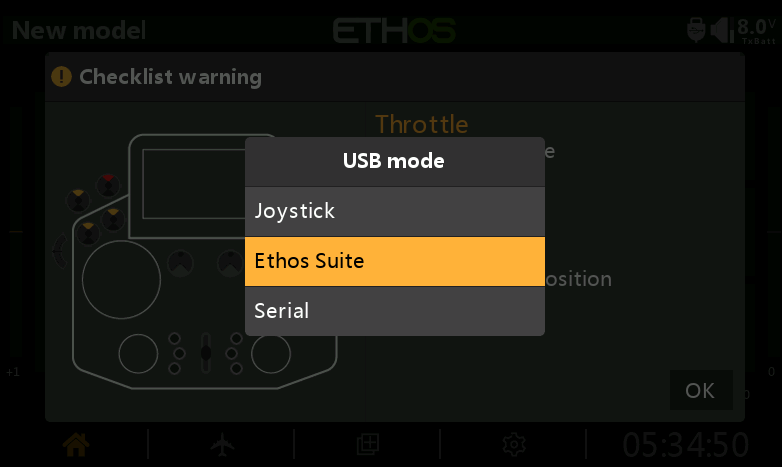
4. Prepare a Type-C data cable. Connect the transmitter to the computer in bootloader mode using the cable, or connect the transmitter to the computer while it is powered on and select the "Ethos Suite" option from the pop-up on the screen to complete the connection.
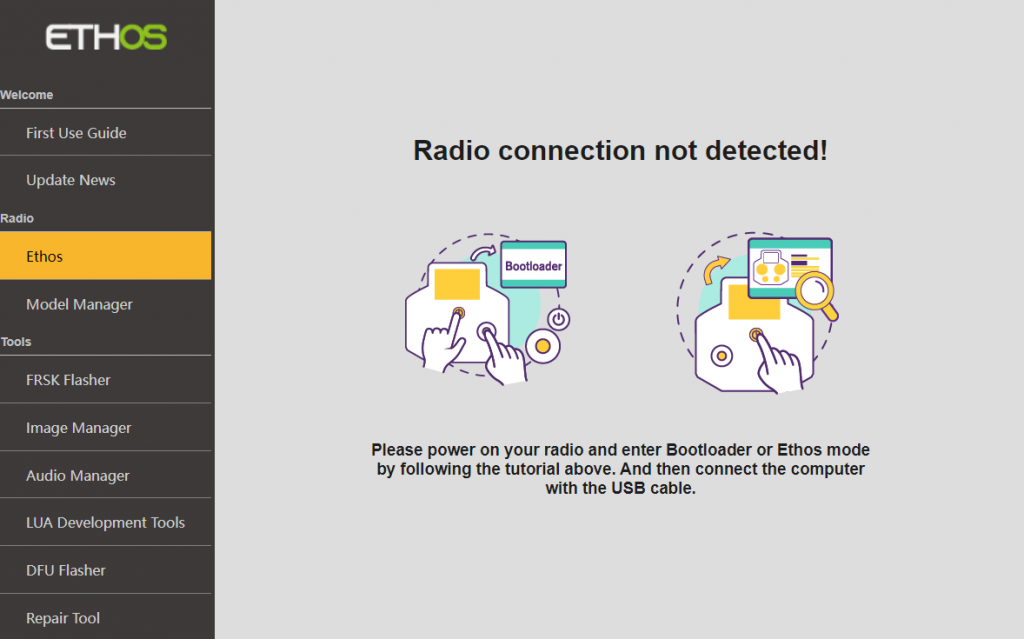
4-1. If the ETHOS Suite software fails to recognize the transmitter, try using a different data cable or computer, then attempt the connection again. If it still cannot connect, please contact FrSky customer support for assistance.
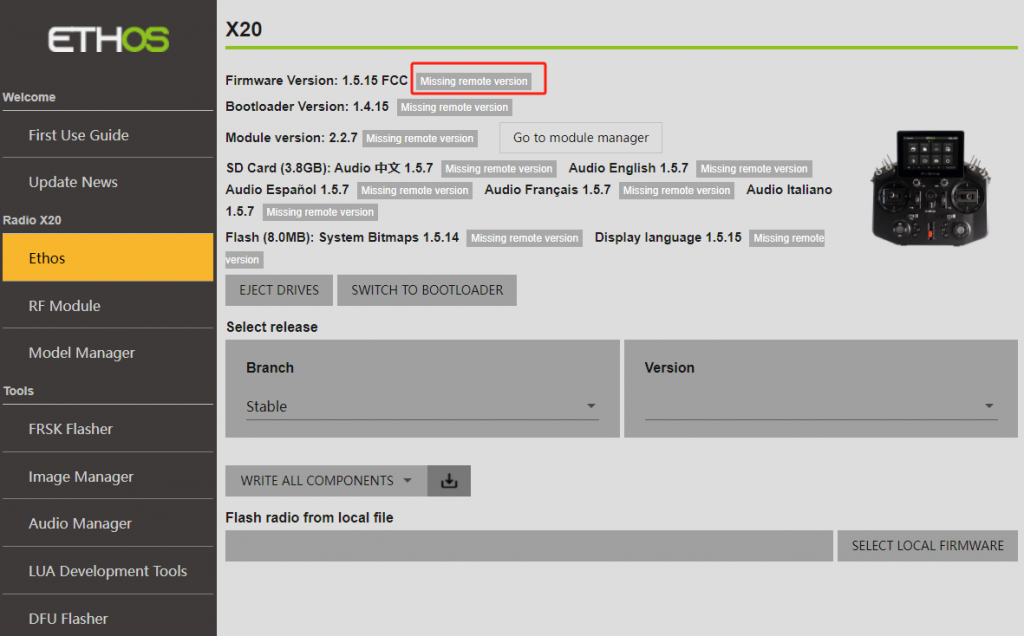
5. After a successful connection, select "Ethos" from the left sidebar. You may encounter the message "Missing remote version" as shown in the picture. You can wait for 2-3 minutes or refresh the page by switching between other options in the left sidebar.
6. Normal display as shown in the image, if [Expired] appears, it means that the current version is not the latest and can be updated.
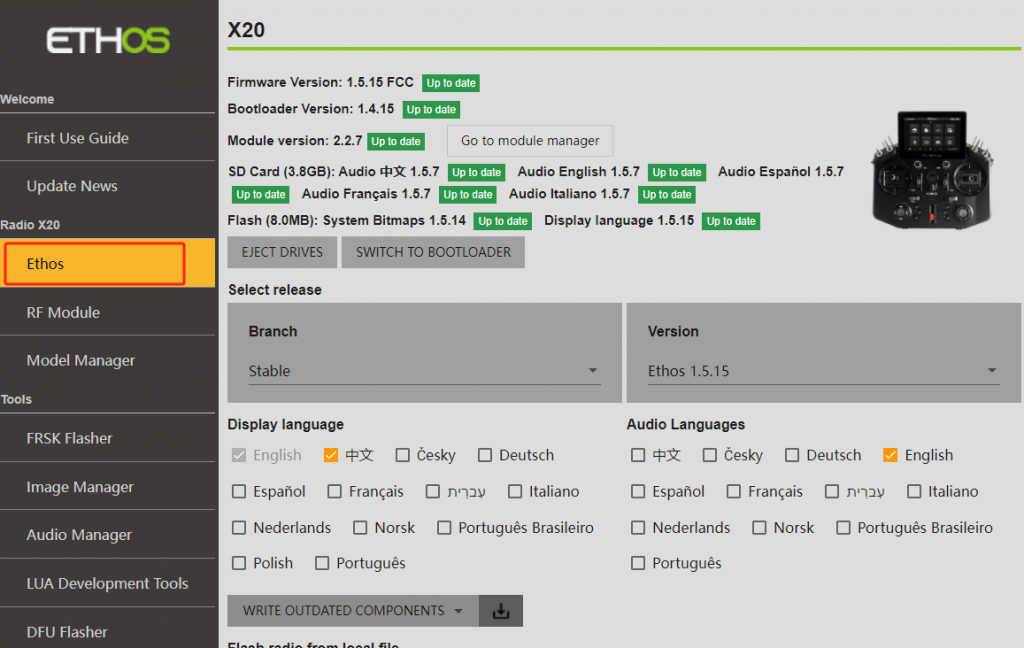
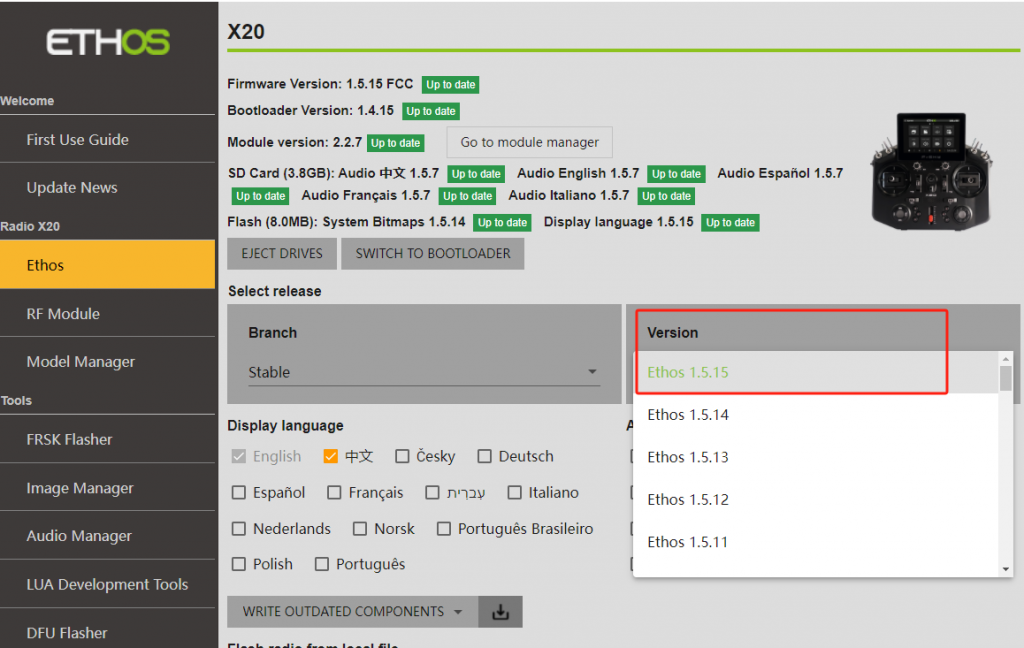
6-1. Click on the 【Version】 option and select the version you want to update to.
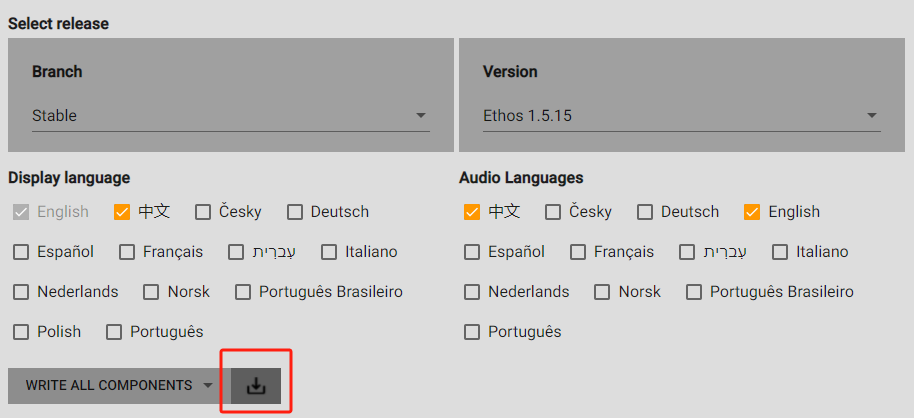
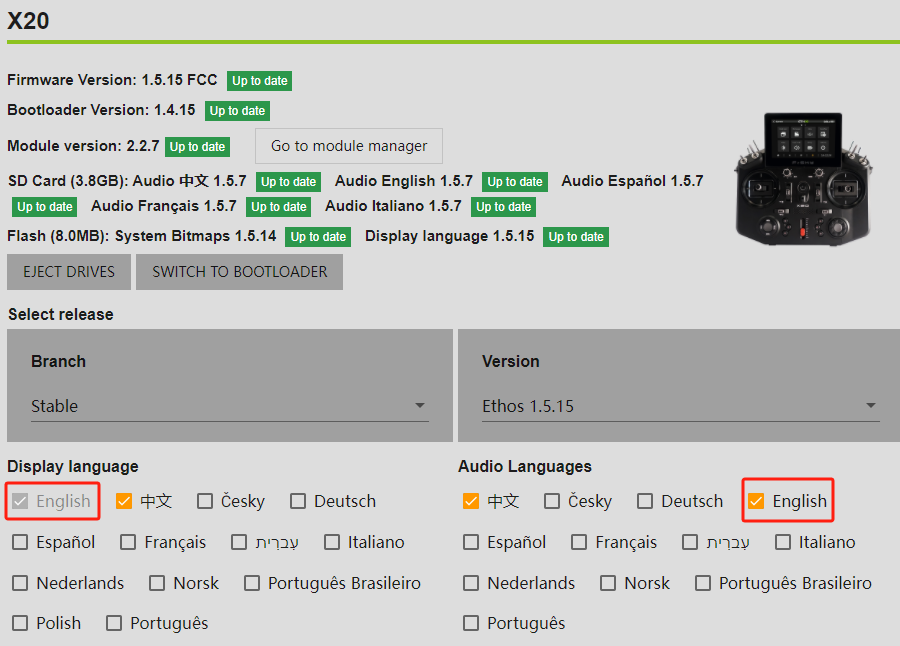
6-2. In the 【Display language】 section, choose the preferred system display language; in the 【Audio language】section, select the desired voice pack, as shown in the picture.
6-3. Click the option within the red box and be sure to select【Write all components】.
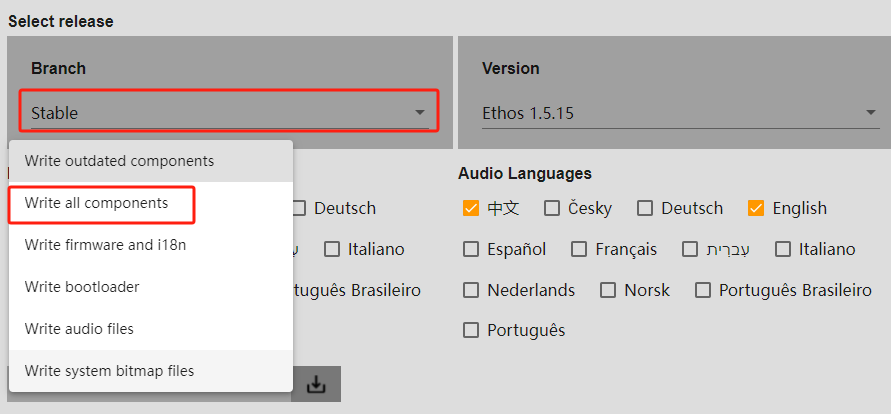
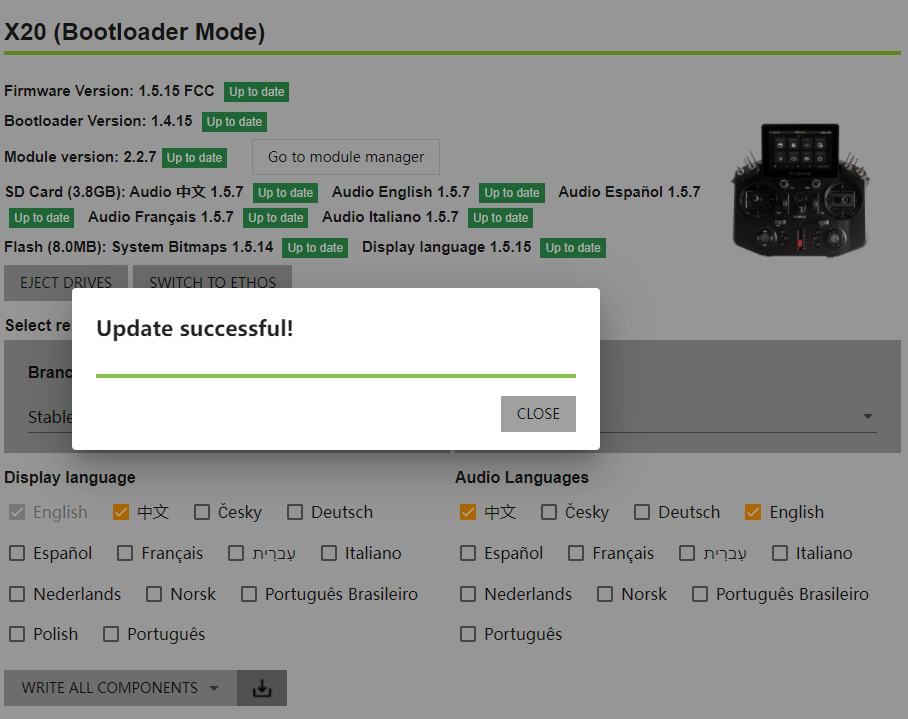
7. Click the "Download" icon to start the upgrade, and wait for the process to complete.
