How to Use the Stabilization Receiver (I)
Introduction: This article only explains the setup operation of the stabilization function. For product introduction and precautions, please refer to the manual.
Before starting the article, let’s first clarify the difference between stabilization and self-leveling in stabilization mode.
Stabilization: Without stick input, it compensates for disturbances (such as wind) to maintain the current flight attitude. (Note: It cannot completely resist external forces, but compensation can be adjusted by modifying the gain to a certain degree.)
Self-Leveling: Without stick input, the flight attitude always keeps the aircraft in a level position. (Note: It cannot completely resist external forces but strives to maintain a level position.)
- Applicable Stabilization Receiver Models
- Preparation
- Mixing Settings
- Stabilization Receiver Six-Side Calibration
- Stabilization Parameter Adjustment
- Aircraft Stabilization Function Debugging Process
1. Applicable Stabilization Receiver Models
This article only covers receivers that support the new stabilization script. The currently supported receivers for the new stabilization script are as follows:
TD Series Receivers: TD SR6、TD SR10、TD SR12、TD SR18
TW Series Receivers: TW SR8、TW SR10、TW SR12
ARCHER PLUS (AP) Series Receivers: AP SR6 Mini / SR6 Mini-E、AP SR8、AP SR10+、AP SR12+
2. Preparation (Using the X20 transmitter and AP SR10+ receiver as an example)
- Please ensure that the X20 system version is 1.5.0 or above, the RF version is ≥ 2.2.6, and the receiver firmware version is ≥ 1.0.11.

Note 1: It is recommended to update the RF version to the latest.
Note 2: Different receiver models may require different firmware versions. It will be compatible as long as the receiver is updated to a version that supports the V3.0.0 script.
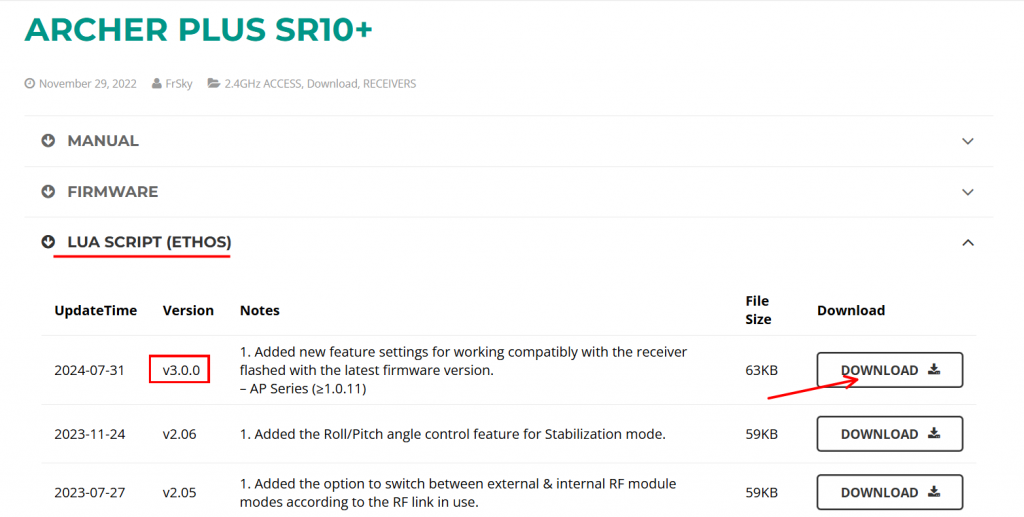
2. Go to FrSky's official website, locate the download page for the corresponding receiver, and download the latest Lua script (current version V3.0.0). After downloading, extract the files.

3. Connect the transmitter to the computer via the bootloader interface and access the transmitter's storage. In the root directory of the transmitter's memory, locate the 'scripts' folder (if it does not exist, please create it manually).

4. Place the extracted 'Lua script' files into the 'scripts' folder.

5. After importing, restart the transmitter. The stabilization tuning icon will appear on the second page of the [System Settings] menu, as shown in the image below:

6. To avoid the impact of switch detection delay, please ensure that "Hardware — Switch Settings — Switch Midpoint Detection Delay is set to 0".

3. Mixing Settings
1. The stabilization channel settings in the mixing page are divided into three types of aircraft: traditional fixed-wing, delta-wing, and V-tail fixed-wing. Each aircraft type corresponds to different assigned channels.
1-1 The channels for fixed-wing aircraft are shown in the image below:

Note: The image shows all channels corresponding to the stabilization function. Users do not need to set up all channels—only the ones required for their specific needs.
1-2 The channels for the delta wing are shown in the image below:

Note: The image shows all channels corresponding to the stabilization function. Users do not need to set up all channels—only the ones required for their specific needs.
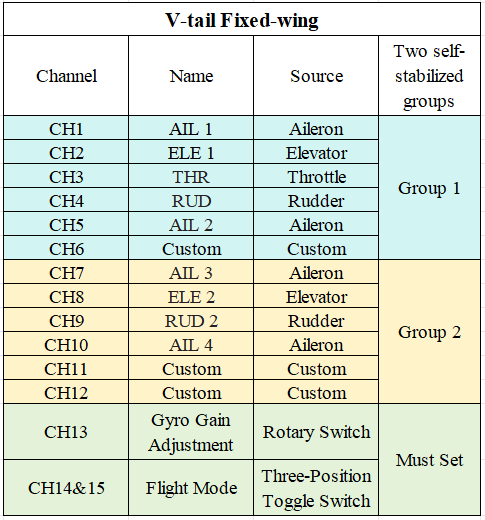
1-3 The channels for the V-tail fixed-wing are shown in the image below:

Note: The image shows all channels corresponding to the stabilization function. Users only need to configure the channels required for their specific setup and do not need to set up all channels.
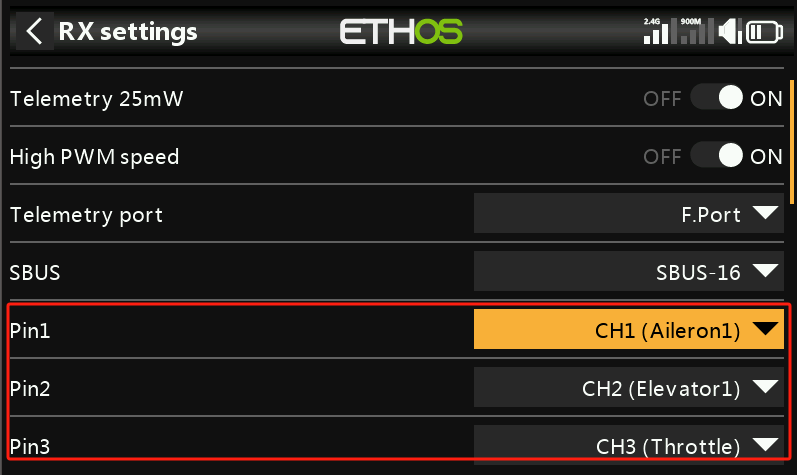
2. Bind the transmitter and receiver. After binding, users can change the "Pin" definitions to the desired channels in the receiver settings (ignore this step if channel changes are not needed).


